Modding
Some of the Treasure Adventure World game files can be edited to modify the game. Here are some guides for modding.
We are currently working on implementing Steam Workshop for uploading and sharing mods.
Contents
Change Game Text
Modifying the game text for translation purposes or fun is easy. Using our translation tool is recommended but all you need is a text editor. Both methods are described below.
Translation Tool
Make a copy of the template on Google Docs - File -> Make a copy
Start editing! - The T (translation sheet) tab contains the script and the following columns.
- Helpers:
- Column A: S Section ID - Do not edit.
- Column B: Tag - String ID - Do not edit.
- Column C: HIDDEN
- Column D: NameTag - Name ID - Do not edit.
- Column E: NameEN - Speaker's name (English) - Do not edit.
- Column G: Duplicate - Indicates that the text contained exactly the same string as another - Do not edit.
- Column E: Name (G) - Speaker's name (From glossary) - Do not edit.
- Column K: # - #TypeSpeed(2 is average)#TxtEffect 0 for normal, 1 for shaking, 2 for shaking & bold, 3 for bold, 4 for italics#ParrotAttitude(0 for non-parrot) - Do not translate.
- Column L: <If translated> indicator - Do not edit.
- Column M1: - % Progress - Do not edit.
- Column N1: - Words Done - Do not edit.
- Column O1: - Words Left - Do not edit.
- Column P1: - Words Total - Do not edit.
- Translation:
- Column F: ENGLISH - English original text - Translation goes to Column I: T (Male)
- Column I: T (Male) - Translation column - Write your translated text here
- Initially, Column J: T (Female) collects the text from Column I: T (Male). In English the gender of Peep is purposely left ambiguous, but in some languages that isn't possible. In this case we can offer a male or female script depending of the user's preference.
The G (Glossary sheet) tab can be used to translate character names - they will auto-fill on tab T
The Stat (Statistics sheet) tab provides more info about progress in specific sections /or/ To split up the work.
The Characters (help) tab is a reference if you want to know what the characters look like.
Once you are done use the Export (Export sheet) tab to copy everything from A2 to A6803 (or B2 to B6803 for the female script) and paste into the "MyLanguage_dialog.diag" file using a text editor.
Text Editor
Editing from a text editor is also possible.
- Locate “dialog” folder in the “taw_files” folder.
- Make a copy of “english_dialog.diag” and rename it (ex: “MyLanguage_dialog.diag”)
- Place it in the “dialog” folder with the other one.
- Open “MyLanguage_dialog.diag” in a text editor and make your changes
Change Config File
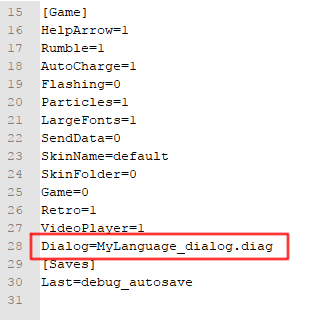
Once you're ready to test the dialog in the game all you have to do is edit the config file:
- Browse to the config file: C:\Users\[USERNAME]\AppData\Roaming\Robit Games\TAW\config\config.cfg - open in text editor
- Add a line under [Game] - “Dialog=MyLanguage_dialog.diag”
Make a Skin
Custom skins can be used to change sprites in the game.
- Download this example skin
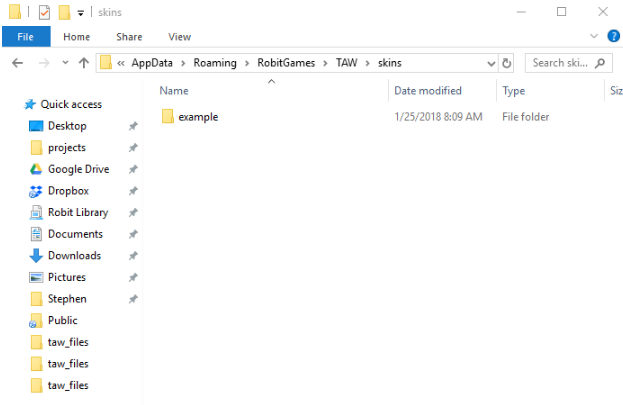
- Unzip and place the “example” folder in C:\Users\[USERNAME]\AppData\Roaming\Robit Games\TAW\skins (you might have to create the skins folder)
- Rename the folder something unique - but no special characters
- Make any changes to skin sprites - be aware if you change the dimensions of any sprites they might not end up positioned correctly in game
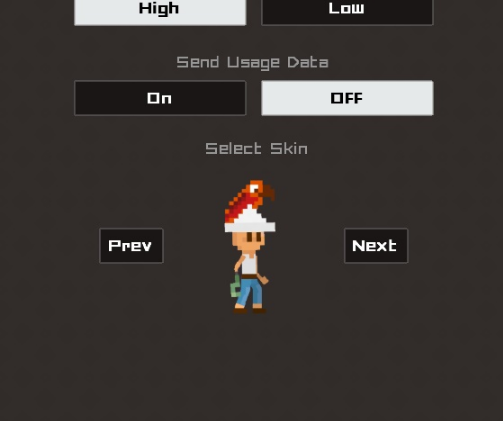
- Launch game and go to the Options menu
- Select your skin and play the game!
Creating Pak Pak Levels
New Pak Pak levels can be added to the game to be played in the arcade.
- Locate the mini-game level folder inside the game's install folder at: ... \Treasure Adventure World\taw_files\data\minigame\
- Create an 84x84 pixel image in this folder, or copy an existing level. New levels can be added by setting the name to "level##.png". Where ## is replaced by the next available number.
- Now this level can be modified in an image editor. The level contains 28x28 3 pixel tall and wide squares that signify different types of level pieces.
When this the level is done: Launch the game and visit the arcade. Your new level should appear after the original 8 levels.
The different available level pieces are as follows:
- Player Spawn Point: A 3x3 orange square with the RGB red value of 255 and green value of 128. The blue value controls the amount of seconds the level allows to complete it.
- Enemy: A 3x3 red square with the RGB red value of 255, and a G and B value of 0. The direction can be set with an orange R:255 G:128 B:0 square in the top-center, left-center, right-center, or bottom-center pixel. If no orange pixel is added for direction the AI will be given a wander AI.
- Path (walk able area): A 3x3 black square with the RGB value of 0 for R, G, and B.
- Wall: A 3x3 blue square with the RGB value of 0 for R and G, and 255 for B.
- Collectible: A 3x3 blue square with the RGB value of 0 for R and B, and 255 for G.
- One-Way Path Block: A 3x3 light blue square with the RGB value of R: 0, G: 150, B: 255. The direction of the one-way block can be determined with a purple R:128 G:150 B: 255 square in the top-center, left-center, right-center, or bottom-center pixel.
The following example contains the possible level pieces and can be used for a test:


